

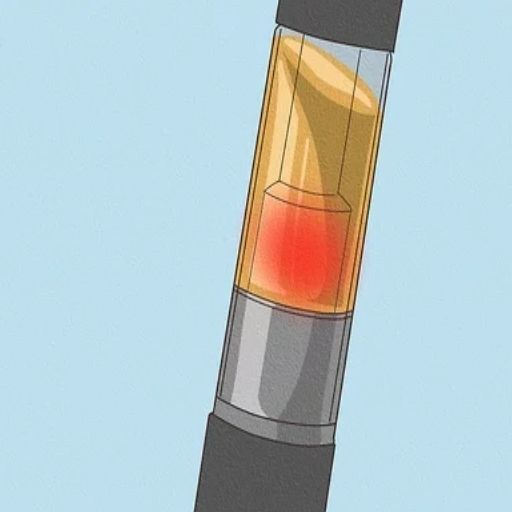
When using vape cartridges, clogging can be a persistent and frustrating issue that disrupts the entire vaping experience. A clogged vape cart may result in restricted airflow, diminished vapor production, or, in some cases, the device completely ceasing to function. This guide is designed to provide practical, step-by-step solutions to help you troubleshoot and resolve clogging issues quickly. Whether the problem stems from improper storage, residue buildup, or incorrect usage, the techniques detailed below will equip you with the knowledge to get your pen hitting smoothly again. By understanding the common causes of clogs and their corresponding fixes, you can maintain optimal performance and extend the longevity of your vape setup.
How to Unclog a Vape Cart: Step-by-Step Guide
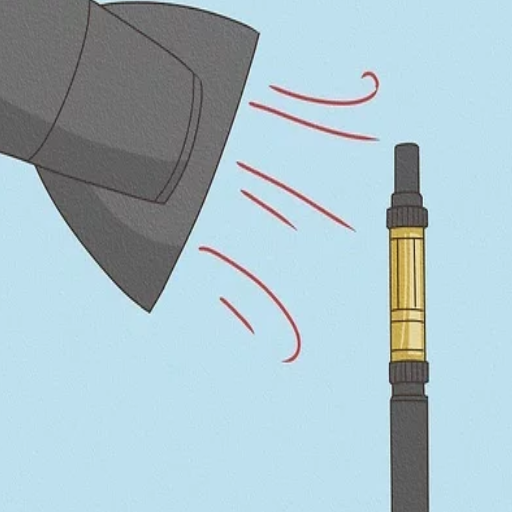
Warming up your vape cart
Heating is one of the easiest and most efficient techniques to unclog and vape cart. Heat can free up thick oil or concentrate that may have solidified or gotten stuck inside the cartridge and resume airflow. Here’s how you do it:
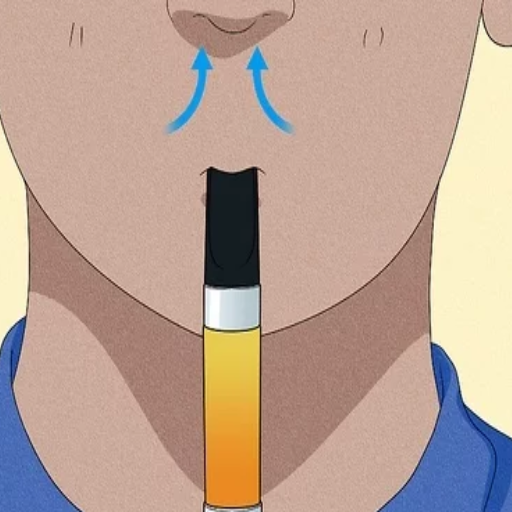
- Manual Heating: Rub the cartridge between your palms for 2 minutes. This is usually enough to get rid of minor blockages by softening the oil.
- Hair Dryer or Heat Source: A hairdryer can also be used in low heat settings. Set the dryer 6-8 inches away and warm the cartridge for no more than 30 seconds to avoid the components overheating.
- Preheat Function on Vaporizer: See if your vaporizer offers a preheat mode; this will apply low-level heat to the cartridge which can avoid the risk of undue overheating.
Never forget that with excessive heat comes severe consequences like compromising the taste and the potency of the oil. Always try to keep the cartridge on lower heat to avoid the overheating of the components.
Clearing blockages with a thin object
Addressing blockages in a vaporizer cartridge or device can be handled effectively with a needle or paper clip. These objects are thin and non-abrasive. Gently insert the object into the airway or clogged section of the device. Applying a gentle touch is advised since forceful measures can damage the internal parts of the device.
Additionally, it is critical to the blockage removal that the object is claimed along the sides, this way it lowers the chances of the device becoming contaminated.
- Object Size: If the object being used exceeds a diameter of 1mm – 2mm, leave behind further widening or worsening the blockage in the device.
- Material Compatibility: Avoid metallic objects at all costs, as they pose a short-circuit threat. Ensure that any object used is made from non-conductive or non-metallic materials, especially when near electrical components.
- Force Applied: Ensure that under 2 – 5 Newtons are used. Anything above that will cause lasting damage to the device.
By adhering to these factors, the process ensures the blockage is cleared efficiently without compromising the performance or integrity of the device.
Troubleshooting Different Types of Vape Cart Clogs
Dealing with airflow issues
Usually, airflow problems in vape cartridges are caused by residue accumulation, malfunctioning parts, or improper assembly. These issues can be dealt with through the following steps:
- Residual Buildup: The airflow components can get clogged by e-liquid residue in excess amounts. Utilize a properly sized plastic scraper to scrape the obstruction away. Always try to provide less than 10-15 Pascal suction pressure while manual testing is carried out to avoid ruining the internal components.
- Improper Assembly: Airflow can get obstructed by loose components like the mouthpiece and coil. These should be checked for alignment first, and any loose fittings should be secured to their appropriate settings. The correct torque is usually between 0.3 to 0.5 Nm.
- Hardware Failure: Constant clogs can also be caused by faulty coils or defective airflow ports. Test for electrical resistance while ensuring the coils are in the set range. Remember, most coils operate between 1.0 to 2.5 Ohms. Always follow the set product instructions while replacing faulty parts.
By identifying the root cause and addressing it within these technical requirements, airflow efficiency can be restored without impacting the cartridge’s structural integrity.
Fixing a clogged mouthpiece
- Residue or Debris Build-Up Inspection: Clogging is primarily due to residue accumulation. Disassemble the mouthpiece and proceed to clean it with isopropyl alcohol, at least ninety percent for complete particle dissolution. Moreover, ensure all components are completely dried before reassembling.
- Airflow Port Examination: Confirm that the airflow ports have met the manufacturer’s specifications regarding diameter, which is set between 1-2.5 mm depending on the cartridge type. Blocking or undersized airways can severely impair efficiency.
- Pressure Consistency Testing: For pressure resistance, gauge airflow using a pressure gauge. The mouthpiece is ideal if the drop of pressure on the monitored side is beneath 0.2 psi.
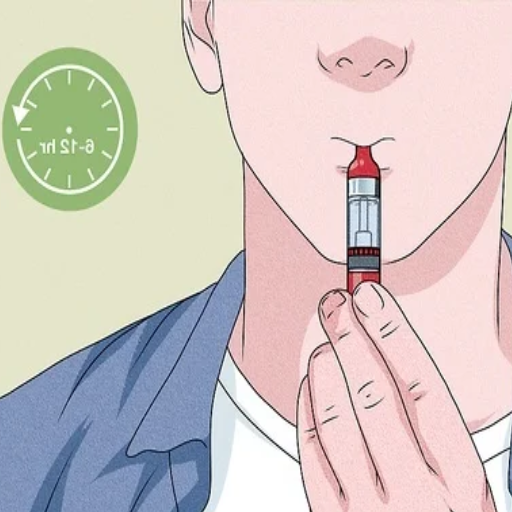
- Power Setting Compatibility Examination: Ensure that the cartridge power settings have been met by the operational range set in the product’s manual (for example: 5 to 12w is suitable). Too much power can lead to overheating, further removal of residue build-up, and subsequently clogs.
- Structural Integrity Examination: Look for cracks or misaligned connections in the mouthpiece. Any hated structural component should be replaced.
By addressing these potential issues within the specified factors, users can restore the cartridge’s functionality while preventing further complications.
Addressing coil and wick problems
When dealing with coil and wick problems, it is essential to first evaluate the resistance level of the coil. Using an appropriate device, confirm that the resistance aligns with the manufacturer’s specifications (e.g., 1.0Ω to 1.5Ω for standard coils, or 0.15Ω to 0.5Ω for sub-ohm coils). If the resistance deviates substantially, the coil may be damaged and should be replaced.
The next step is to check the wick for any signs that could indicate burning or lack of saturation. A wick that has been burnt will result in an unpleasant taste and lower performance in terms of output. Before setting the wick in any place, make sure that it is fully saturated. For example, after the refill, the wick has to be kept in e-liquid for 5 – 10 minutes. The dry hit problem will point towards a lack of certain wicking materials or blockage of e-liquid channels which require changes or removal of wicking materials.
Lastly, use power settings that match the coil’s rating to prevent damage or overheating. For example, a coil rated for 10-20W should not exceed 20W during operation. By systematically addressing these factors, you can resolve most coil and wick issues effectively.
Can You Unclog a Disposable Vape Pen?
Unique challenges with disposable vapes
The challenges with disposable vape pens stem primarily from their construction, which seldom has any sort of user-maintainable parts. Blockages or lessened vapor output are frequent problems, usually caused by airflow blockages or e-liquid gelling at cooler temperatures due to residue buildup.
In my experience, loosening e-Liquid by gently warming the vape pen in your hands, or exposing it to moderate warmth, tends to yield the best results for unclogging disposable vape pens. Just be mindful: too much heat can tamper with the device. If there is an airflow obstruction, I find using a sharp instrument like a needle to carefully probe the obstructed area is quite effective, but caveat; be gentle and avoid breaking any internal parts.
Unfortunately, technical requirements are often not provided for disposable models, leaving users with limited data on power or coil resistance. It’s important to handle the device within its presumed operational range, use it at room temperature, and replace it once a performance decline becomes evident, as these vapes are not designed for long-term or customizable use.
Safe methods to try on disposable pens
To address the safe methods for handling disposable vape pens, I recommend the following techniques, based on practical experience and technical understanding:
- Preventing Extreme Heat Exposure: Using too much heat with disposable pens is dangerous. If exposed to excessive heat, the battery and heating coil can get damaged. Ensure that the pens are not used in areas that exceed temperatures of 50F to 85F (10C to 29C). Always shield them from prolonged sunlight as well as extreme temperatures.
- Testing Battery Features and Using the Device: In most cases, specifications such as voltage and battery capacity are not provided. Many disposable pens utilize a voltage output from 3.3 to 3.7. This range is regarded as safe. Always refrain from fooling around with non-rechargeable battery units, as they pose a safety risk.
- Take the occasional break: If you notice the pen heating too much during use, ensure that you rest for a few minutes to allow it to cool. Doing so alleviates added strain on the coil while providing steady performance.
- Regulation of End-of-Life Criteria: An end-of-life condition has been reached when the used disposable pen has little to no vapor production. Disposable pens, meant for single use, are not adjustable or refillable. At this stage, the pen coil or e-liquid supply has been exhausted. The pen should be discarded at this point.
Following these guidelines can facilitate the technical performance and operational life of the disposable vape pen, while also protecting it from potential malfunctions.
Preventing Future Vape Cart Clogs
Proper storage techniques
The vape pen and cartridge must be kept in a safe place to prevent clogs and increase their life expectancy. Make sure the vape device is stored upright in a cool, dry place away from extreme heat or direct sunlight. High temperatures will thin the e-liquid which will result in leakage or blockage, and just like that, extremely cold temperatures will thicken the e-liquid which will prevent it from flowing properly.
I suggest going for a temperature range from 50F to 77F (10C to 25C). This would help maintain the amount of viscosity in the e-liquid and the integrity of the components. Make sure to keep the vape pen sealed or capped when it is not in use because dust or debris getting into the mouthpiece and air chamber will cause clogging.
Including silica gel in storage cases is also effective in maintaining a dry environment. Be cautious to not expose the device directly to the packets because they absorb moisture. Following this guidance can help reduce the risk of clogging, ensuring the device is in optimal condition.
Regular cleaning and maintenance tips
To clean vape devices properly and maintain their functionality, cleaning, and maintenance are critical. Start by taking the vape apart, and detaching the tank, mouthpiece, and coil. Rinse the tank with warm water but do not dunk any electronic parts. For e-liquid residue, isopropyl alcohol (” at least 90%) will suffice. All parts need to dry completely before putting them back together; otherwise, it will ruin the internal circuits.
The grime on the coil would need thorough scrubbing. Do this while checking for any signs of wear. Regardless, it would be best to change the coil after every one to two weeks. Lots of factors will determine how quickly the build-up occurs like type of e-liquid, and for sugary or heavily flavored e-liquids build-up occurs much faster. For the mouthpiece, use a cotton swab, warm water, or alcohol and clean the debris from small openings.
Make regular maintenance a habit and, from time to time, check the battery connections to see if there is any corrosion. Use a dry cloth to wipe the contacts to maintain a steady power flow. For vape devices that allow adjustable wattage or temperature, stay within the recommended parameters to prolong the life of the coil and battery.
Following these instructions and checking bi-weekly or once a month as necessary will ensure your device is functioning at its peak.
When to Replace Your Vape Cart
Signs that unclogging won’t solve the problem
Once you notice that your vape cartridge is malfunctioning persistently, some signs would indicate that cleaning alone is insufficient. Aiming to unclog the device did not help, indicative of the following red flags:
- Continual Burnt Taste: A burnt flavor that continues to bother you even after trying to clean the coil hints towards a damaged coil that ought to be replaced.
- Absence of Vapor Production: If you notice that your vape is emitting very little, if not zero, vapor, even after cleaning all the components, means that the components are fully charged. This is quintessentially a sign that there is an issue with the coil or cartridge. Also, ensure that your vape is within the correct wattage range that varies from model to model.
- Damage or Leakage: Strain in the cartridge followed by slow leakage of e-liquid is problematic and should not be ignored. This indicates damage that cannot be mended so go ahead and replace the cartridge.
- Severed Electrical Connections: Lack of functioning concerning the vape detecting the cartridge or getting power supply consistently after cleaning the connectors of the vape means there is an internal issue with the cartridge circuitry.
Always remember to spot the issue in the first stages to avoid unnecessary troubleshooting and optimally resolve the vape cartridge issue.
How to safely dispose of a clogged cart
Proper disposal of a clogged cartridge needs to be done in an eco-friendly and safe manner that does not put the user or the environment at risk. The initial step involves ensuring that no excess e-liquid is left in the cartridge. Refrain from attempting to drain the liquid into sinks or any other drains as those chemicals can pollute water systems. Instead, use a paper towel to soak up any remaining liquid and toss it with general household waste.
The next step is to take the cartridge from the battery unit. The battery which is made up of electronics must be disposed of in specialized e-waste centers or through local recycling programs. For the cartridge, confirm whether your area offers recycling programs that accept metal and glass components. If that is not the case, then securely wrap the cartridge with tissue or cloth to prevent leaks and throw it with general waste.
In summary, the whole process can be divided into three components:
- Properly Dispose Liquid: Soak up the e-liquid residue with tissue; under no circumstances should liquid be poured into sinks or drainage systems.
- Separate Parts: Remove the cartridge from the battery for scheme-free disposal or recycling.
- Recycle or Wrap Disposables: If possible, dispose of the waste at a disposal facility, or wrap it securely so that it can be safely thrown away with regular household waste.
With the steps provided, you guarantee that the obstruction problem has been fixed without posing extra threats to the environment.
Reference sources
Frequently Asked Questions (FAQs)
Q: Why do vape carts get clogged in the first place?
A: Vape carts can get clogged due to various reasons, including temperature changes, improper storage, or thick vape oil. When the oil becomes too viscous, it can solidify and block the airflow, preventing you from taking a hit. Understanding vape cart mechanics can help prevent these issues.
Q: What are some quick fixes to unclog a vape cartridge?
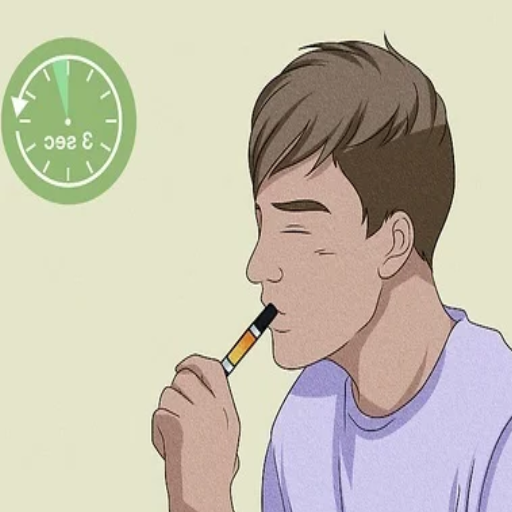
A: To unclog your vape, try these easy fixes: gently warm the cartridge with a hair dryer or by rolling it between your hands, take a few short puffs without activating the battery, or use a thin object like a paperclip to carefully dislodge any blockage. These methods can help melt the clog or clear the airway.
Q: How can I prevent my vape carts from getting clogged?
A: To prevent cart clogs, store your vape in a cool, upright position, avoid exposing it to extreme temperatures, and clean the mouthpiece regularly. Also, avoid taking hard pulls, as this can draw excess oil into the airway. Proper maintenance and usage can significantly reduce the chances of clogs.
Q: What should I do if my vape doesn’t produce any vapor?
A: If your vape doesn’t produce vapor, first check if the battery is charged and properly connected. If that’s not the issue, the cart might be clogged. Try the unclogging methods mentioned earlier. If the problem persists, the cartridge might be faulty or empty, and you may need a new vape cart.
Q: Can I unclog a cart while it’s still attached to the vape battery?
A: It’s generally safer to remove the cartridge from the vape battery before attempting to unclog it. This prevents any potential damage to the battery or electrical components. Once removed, you can try various methods to unclog your cart without risking the rest of your device.
Q: How do I know if my vape cartridge is clogged or just empty?
A: A clogged vape cartridge will still have visible oil but won’t produce vapor when you inhale. An empty cart will have no oil left and also won’t produce vapor. If you can see oil in the cartridge but can’t take a hit, it’s likely clogged. Try the unclogging methods before assuming your cart is empty.
Q: Are there any risks associated with using a clogged vape cartridge?
A: Using a clogged vape cartridge can potentially lead to inhaling small particles of solidified oil or burning the wick if you repeatedly try to vaporize without proper airflow. This can affect the flavor and potentially the safety of your vaping experience. It’s best to unclog your vape before continuing use.
Q: How often should I clean my vape to prevent clogs?
A: Regular maintenance can prevent cart clogs. Clean the mouthpiece and connection point of your vape cart weekly, or more frequently if you’re a heavy user. For refillable carts, clean them thoroughly between refills. This routine, combined with proper storage, will help keep your vape hitting smoothly.


