

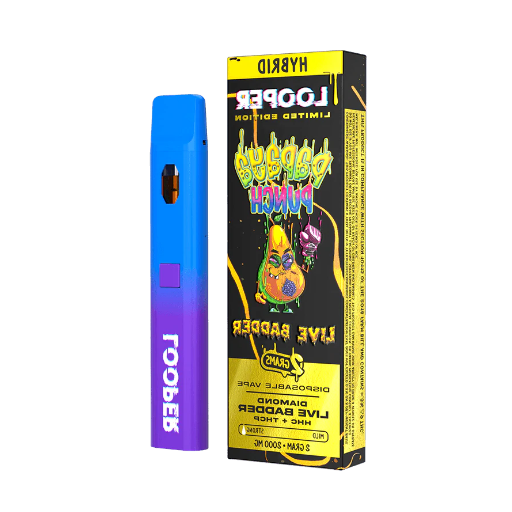
Vaping has gained significant traction as an alternative to traditional smoking, offering users a convenient and discreet experience. Among the various options available in the market, the Looper Disposable Vape Pen stands out for its simplicity, portability, and ease of use, making it an excellent choice for beginners. This guide is designed to provide a comprehensive walkthrough on how to properly use the Looper Disposable Vape Pen, ensuring an optimal vaping experience. From basic setup instructions to troubleshooting common issues, this article will equip you with the knowledge needed to operate the device.
What’s the Correct Way to Inhale from a Looper Disposable Vape?
Proper inhalation techniques for new users
I make sure to use an easy, controlled choking inhalation method while using the Looper Disposable Vape Pen for the first time to achieve the best results. To begin with, I take a slow and steady draw from the mouthpiece while not putting in too much effort, as the pen possesses an auto-inhale feature. Taking hard puffs is strongly discouraged, as this can quench the coil and cause poor performance. Instead, to assist the device’s airflow system in delivering smooth vapor, I concentrate on consistent small intakes.
- Battery capacity: Looper pens are disposables with an internally installed battery that is fully charged. The battery can support the claimed number of draws before depletion.
- Voltage output: Looper pens have a controlling, optimized voltage, which greatly improves the efficiency of the pen. II has the neaserement of heating the coil for consistent vapor production.
- E-liquid capacity: Each device is filled with a certain amount of e-liquid (with 2 or 5 mL), which has been shown to match the number of puffs for its lifecycle.
I solely follow the instructions from the manufacturer in terms of usage because my safeguard is the careful calibration of these multiple measurements, which allow performance to be maintained in addition to the user’s safety.
Adjusting airflow for optimal vaping experience
The management of airflow is also crucial in modifying the device since it affects vapor weight, flavor, and throat hit. For example, increasing the airflow causes a greater volume of air to flow through the device, which leads to vapor that is smoother and cooler. Decreasing the airflow, on the other hand, increases the intensity of the flavor and may lead to warmer vapor with a strong throat hit. Advanced devices often come with adjustable airflow mechanisms such as rotary dials or sliding panels, which allows users to modify their devices as per their expectations.
In discussing a device’s performance about air flow, it is important to also consider another technical factor, which includes coil resistance and wattage. For example, in the case of low-resistance coils (sub-ohm, below 1.0 ohm), higher wattage settings are likely to cause overheating when air flow is restricted and will need to be cooled. However, high-resistance coils (above 1.0 ohm) tend to perform better at lower wattage settings, which means having more flavor when the airflow is restricted.
Most advanced vaping websites suggest beginning with a tentative airflow adjustment, trying out new settings, and consulting the manual to achieve the best mix of flavor and vapor. Observing these principles guarantees safe, personalized usage of the device while maximizing its effectiveness.
Tips for avoiding common inhaling mistakes
Minimize standard breathing blunders while vaping by verifying that your airflow setting is correctly positioned. According to available information from leading vaping websites, it is very important to work out a sweet spot at which your device’s resistance level and wattage settings are in harmony. For example, high-resistance coils (over 1.0 ohm) perform well with lower wattage settings between 7W to 15W and somewhat constricted airflow. This guarantees that the maximum amount of flavor is produced without straining the system too much.
After that, ensure that the proper inhalation method is preserved. In higher resistance MTL devices, draw vapor into your mouth first before pulling it into your lungs. On the other hand, low-resistance coil (under 0.5 ohm) DTL devices with open airflow of 30W to 60W enable a smoother experience. Crosscheck your device manual to be sure about these settings.
Don’t forget, over-inhaling or chain vaping is not advisable as it leads to overheating of the coil, resulting in a burnt taste. Following the manufacturer’s recommendations and being patient while taking slow, deliberate inhalations will protect the device’s lifespan while making vaping sessions even better. Last but not least, always make adjustments in small steps to get an ideal figure and ensure there is a reason behind every change made.
How Long Does a Fully Charged Looper Disposable Vape Last?
Understanding puff count and battery life
The life span of a fully charged Looper Disposable Vape is primarily dependent on two factors: total puff count and battery capacity. Most Looper disposables are capable of delivering 600 to 800 puffs, but some models with extended capacity may be capable of exceeding 1000 puffs. This puff count is closely related to the specifications of the battery, usually quantified in milliampere hours (mAh). A standard Looper disposable vape is made with a battery ranging from 300 to 500 mAh.
- Puff Count: 600–800 puffs (this varies depending on model and usage).
- Battery Capacity: 300–500 mAh (Mean for basic models).
- Voltage Output: Usually constant at approximately 3.7V for power consistency.
- E-Liquid Capacity: Device dependent, ranges from 2 mL to 5 mL.
Key usage behaviors, like puff duration and inhalation strength, as well as external temperature, can affect how long the device lasts. Following the manufacturer’s instruction for maximum puff count and battery efficiency helps provide the best results.
Maximizing the lifespan of your disposable vape
If you want to extend the life cycle of your disposable vape, here are some effective methods backed by research and technical findings:
- Store at the Correct Temperature: Avoid exposing the device to extremities of heat or cold as this would be detrimental to the internal battery and the e-liquid. To avoid instability in chemicals and batteries, the vape should preferably be stored between the temperatures of 15 degrees Celsius to 25 degrees Celsius (59 Fahrenheit – 77 Fahrenheit).
- Clean Airflow Vents: Ensure that the airflow vents are not blocked or clogged. Blockages can cause disruption in the normal function of the device which results in either incomplete vaporization of the e-liquid or over-stressing the battery.
- Restrict Breath Duration: Taking long, deep, and frequent puffs quickly exhausts the internal battery and can strain the vaping coil. Waiting for a minimum of 15 to 30 seconds between the puffs provides the device time to cool and allows the user to pause between puffs.
- Position upright when idle: Keeping the vape upright when not in use limits the e-liquid from leaking and helps protect the coil from overheating and vapor production becoming inefficient.
- Do Not Try To Recharge: Unless the vape is designed to recharge, attempting to do so would cause significant safety hazards and damage the integrity of the device, causing it to become inoperable.
The engineering limitations of disposable vape devices, like finite battery cycles and e-liquid volume, support these practices.
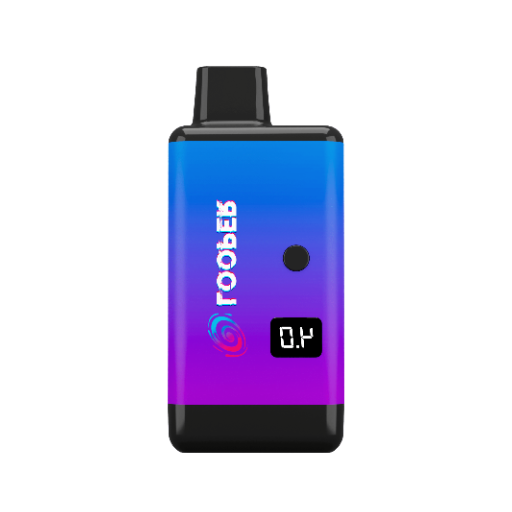
What Do the LED Light Indicators on Looper Vapes Mean?

Decoding different LED light patterns
The LED indicators on Looper vapes are meant to flexibly and elegantly convey information regarding the device usage and its operational status. Familiarity with these signals prevents the mismanagement of issues, thus ensuring optimal usage. Below are the common LED light patterns along with their explanations:
- Solid Light: A users puff indicates a stalled LED. This confirms normal operation and proper flaws as well as vapor is being dispensed by the device.
- Blinking Light: Intermitted blinking lights suggest a battery that is depleted and on the mark for recharging or if it is of such a make, replacement.
- Rapid Blinking Light: The flashes can be inconsistent but can nevertheless indicate some form of difficulty or an internal safety lockout condition due to an overdraw or possible short. Using the user manual is beneficial in this case.
- No Light: With the light not illuminating while it is under use suggests the battery more likely than not will be in need of charging, some connectivity problem might exist or the device might have done its time.
- Red Light: Red light while plugged into the power supply suggests the device is being charged. Many models change their light once the battery is fully charged. Most will turn into green.
Through these LED patterns, users can solve basic problems and verify that the Looper vape functions properly.
Troubleshooting common LED indicator issues
- No Light: When the LED indicator is inactive, it usually indicates one of three concerns. First, the battery might be dead, and it is time to recharge the device. Make sure that you are using the charging cable and adapter intended for use by the manufacturer (e.g., 5V/1A). Second, there can be a break in the circuit between the device and the battery. Make sure that the cartridge and charging port are properly connected and that there isn’t any dirt obstructing them. Lastly, the device may have reached the end of its functional life cycle, especially if it has been heavily used over time.
- Red Light While Charging: A red light confirms that the device is charging. Most devices with such an indicator power on a red light during a charging cycle because they qualify the standard lithium-ion charging guidelines as set by IEEE 1725, which states that a device must charge to a threshold of 4.2V before switching off. When that threshold is reached, many devices will later switch off, indicating they’re fully charged with a green light. If a device stays red, it may not be functional. Check the power source and the cable for functionality or assume there’s a problem with the battery.
- Flashing or Strange Light Activities: Instances of blinking lights often correspond to certain error cases, for example, low battery, wrong voltage usage, or an atomizer problem. Peruse the user guide to interpret dying patterns because they are usually marked for problem-solving. For example, five rapid blinks might indicate a short circuit; scan for any issues within the cartridge and pin connection.
By following these steps and aligning them with technical requirements, users can ensure optimal functionality and issue resolution for their devices.
How to Troubleshoot Common Looper Disposable Vape Problems
Dealing with airflow blockages
Use of Loopers disposable vapes can lead to blockage of airflow, which is a result of residue buildup, lack of proper storage, or manufacturing defects. To solve these issues, take the following steps:
- Check External Parts: Check mouthpieces and surface openings for condensation. Depending on the air flow holes, carefully clean them with a dry, soft instrument, like a toothpick or cotton bud. Always defeat the damage or breakage claw with excess strength sothe device remains intact.
- Clear the External Airflow Path: If cleaning external components does not yield change than try adjusting internal components. Along with unblocking parts of devices, slowly shake the device from side to side to aid the breaking apart of liquid or debris that is trapped within the cartridge.
- Check Appropriate Voltage Jan Settings: Make certain the device’s power source is compatible with it. If voltage is too low or high (more than 4.2V with standard use batter), air flow can be blocked due to condensation. Refer to user manual to find out the cylindrical parameters of voltage.
- Avoid Condensation Build-Up: Position the device upright to impede shipment of liquid in the vape as it enables the airflow channels to become clogged. This is helpful when the device is operated in conditions that are wet.
Blockage can be removed by conducting these actions, allowing normal airflow and consistency in device performance.
Fixing e-liquid leakage issues
Leakage of E-liquids is an uncommon problem that can cause the device to malfunction as well as create an unsatisfactory user experience. To tackle this problem efficiently, make sure you follow these technical instructions:
- Look For Cracks In The Tank That Leads To Leakage: Start by looking for cracks in the tank that would allow the seals to leak. Usually, damaged O-rings and too loose or too tight components are common offenders. Get any defective parts replaced with the right parts from the manufacturer.
- Tank Should Not Be Overfilled: Overfilling a tank will increase pressure inside the tank and facilitate e-liquid to flow out through the airflow holes. Always follow the fill line provided in the manual. Most tanks are optimally filled when they contain around 80%-90% of their maximum volume.
- Ensure Compatibility and Tightness Of The Coil: Ensuring compatibility of the coil with the tank is very important, along with ensuring the coil is well tightened. Ill-fitting and loose coils would disturb the internal pressure balance, which will cause leaks. For example, make sure the resistance is set to the range recommended by the device. For MTL setups, the recommended range is 0.8-1.2Ω, so make sure to use the right value for pressure balance.
- Adjust Vaping Technique if Necessary: Still, excessive forceful inhales of the device can increase pressure and pull liquid into the airflow chamber. Slower and more moderate inhales tend to be less problematic. Also, make sure the wattage is appropriate for the coil being used. For instance, if a coil rated for 10-15W is being used, it is advisable not to go above this range.
- Perform Regular Maintenance: Casing and airflow channels should be maintained cleean to help prevent the accumulation of residue material which could become pathways for leakages. While these components need to be cleaned using soft cloth, the components must dry completely before being put back together.
Following these procedures sequentially dampens the amount of leakage from e-liquid while performing the device towards optimal, ensuring a much more pleasurable vaping experience.
What to do if your Looper vape won’t hit
When troubleshooting a Looper vape issue, consider these practical vaping maintenance suggestions:
- Battery and Connection Review: Inspect the device battery first because it may need charging. If it has a removable battery, double-check that it’s sitting in the device correctly, free from dirt and corrosion. Also, look at the tank-battery joint for signs of looseness or blockage. Dust and residue can be removed and cleared with a light cloth for a better connection.
- Coil and Wattage Check: Examine the coil for damage, as a burned coil will affect the overall performance of the device. Ensure that the required coil is replaced and that it satisfies the specification requirements for your device. For example, if the device requires a 0.8 ohm coil, the wattage should ideally be at the device range of 12-18W. Improperly set wattage range can lead to device malfunctioning too.
- Airflow and Tank Assembly Verification: Begin by taking the tank apart, so each of the relative pieces can be inspected. Check for blockages in both of the airflow channels, as clogs can impact vapor production. Loose plumbing from any components may result in functional problems too. The tank should be put back together with each part being fastened and aligned with one another.
- Select the Right E-Liquid: Thick e-liquids with high VG and vegetable glycerin concentrations can sometimes be counterproductive with wicking, as it is more difficult to wick these liquids particularly is smaller coils and devices with lower power. Ensure the e-liquid viscosity is compatible with the capabilities of your device, for example a standard device would be better suited with a 50/50 VG/PG blend.
- Reset or Update the Device: With regards to the more advanced models of the Looper vape, the ones with digital controls, perform a reset with your device by following the on-screen instructions. Likewise, any confirmed firmware updates should be made, as the device will operate more optimally if it is on the latest version.
Adjusting these factors, along with the steps mentioned, allows for resolving most hitting issues efficiently.
Are There Any Safety Tips for Using Looper Disposable Vapes?
Proper storage and handling of your vape pen
The life span and safety of your Looper disposable vape can only be guaranteed through proper storage and handling procedures. For optimal storage, avoid direct sunlight and extreme heat, since temperatures higher than 113°F (45°C) will damage the internal components and degrade the e-liquid. Further, avoid excessively cold environments, as low temperatures may thicken the e liquid, impairing device performance. Using protective cases during transport will prevent accidental damage, and storing the device upright will further minimize the chance of e-liquid leakage.
Take care in not exposing the vape pen to water or other liquids while handling since even the slightest amount of moisture can result in some electrical failures. Also, take care in not overusing the device beyond its puff or lifespan specifications, which partially depend on the model but are usually provided in the product manual.
For further parameters regarding optimal temperature ranges, tap and puff specifications, or storage environments, refer to the user’s manual or manufacturer’s guidelines. These details are critical to preserving device functionality and ensuring safe use.
Understanding nicotine content and usage
The nicotine concentration in e-liquids is usually expressed in terms of milligrams per milliliter (mg/mL), which affects how strong the e-liquid is, as well as how much nicotine is delivered per puff. For example, there are common formulations that have concentrations of 3 mg/mL for low strength, and there are formulations that have 18 mg/mL and higher for potent strength e-liquids. Knowing what strength to select depends on one’s preferences, previous smoking experience and what is desired, like reducing or quitting nicotine altogether.
In terms of usage, both devices and e-liquids come with some technical specifications that include wattage and resistance for maximum efficiency. For example, lower concentrations of nicotine is often paired with sub-ohm devices with low resistance (<1 ohm) to produce greater vapor clouds. However, higher concentrations are compatible with devices with higher resistance (>1 ohm) to produce more comfortable throat hits. Also, puff limits and coil resistance dictate the efficiency and constancy of how vaporized nicotine is delivered, and these are usually provided by the manufacturer.
Key data to verify include the range of mg/mL for nicotine, wattage compatibility, resistance levels, and puff limits, all of which are essential to maintaining both safety and effectiveness.
Reference sources
Frequently Asked Questions (FAQs)
Q: What is a disposable vape pen, and how does it work?
A: A disposable vape pen is a ready-to-use device that comes pre-filled with e-liquid or cannabinoid concentrate. It works by heating the liquid to produce vapor, which you inhale through the mouthpiece. These devices are designed for one-time use and are perfect for those new to vaping.
Q: How do I start using my Looper disposable vape device?
A: To start using your Looper disposable vape device, begin with unboxing it. Remove any protective packaging and locate the mouthpiece. Most Looper devices are draw-activated, meaning you simply need to inhale through the mouthpiece to activate the device and produce vapor. There’s no need for buttons or complicated settings.
Q: How long does a Looper disposable vape pen last?
A: The lifespan of a Looper disposable vape pen can vary by model and usage patterns. Generally, they’re designed to last until the e-liquid is depleted or the battery dies. This could range from a few days to a couple of weeks for average users. Some models may be rechargeable, extending their lifespan.
Q: What does it mean when my Looper vape pen is blinking?
A: When your Looper vape pen is blinking, it’s usually an indicator light flashing at appropriate times to communicate various messages. Common reasons include: 1. Low battery 2. Device malfunction, 3. Overheating protection 4. End of life (e-liquid depleted): Check your device’s manual for specific blink patterns and their meanings.
Q: Can I recharge my Looper disposable vape pen?
A: Some Looper disposable vape pens are rechargeable, while others are not. If your device has a USB port, you can recharge it using a compatible charger. However, be careful not to overcharge the device. If your Looper pen is not rechargeable, it’s designed to be disposed of once the battery or e-liquid is depleted.
Q: How do I know if my Looper vape pen is locked or unlocked?
A: Some Looper vape pens can be locked for safety reasons. To check if your pen is locked or unlocked, try pressing the fire button (if it has one). If it doesn’t activate, it may be locked. Many models can be locked or unlocked by pressing the fire button multiple times in quick succession. Refer to your device’s manual for specific instructions.
Q: What should I do if my Looper disposable vape pen isn’t producing vapor?
A: If your Looper disposable vape pen isn’t producing vapor, try these steps: 1. Ensure the device is charged (if rechargeable). 2. Check for any blockages in the mouthpiece and clear them if necessary (you can use a toothpick). 3. Make sure the device isn’t locked. 4. Look for any signs of damage. If these steps don’t work, the device may be faulty or depleted and need replacement.
Q: Are there any tips for a smooth vaping experience with a Looper disposable vape pen?
A: For a smooth vaping experience with your Looper disposable vape pen: 1. Take slow, steady draws. 2. Start with shorter puffs and gradually increase as you get comfortable. 3. Store the device at room temperature. 4. Keep the mouthpiece clean. 5. If the vapor feels too harsh, try taking shorter puffs or holding the vapor in your mouth briefly before inhaling. Remember, it’s worth taking the time to learn how to use your device properly for the best experience.


